Feature Walk through
Create monoZ:Link account
If your organisation already holds a monoZ:Link account, contact your organisation admin to add you as an user. If your organisation doesnt have an account, follow the steps below to create an account.
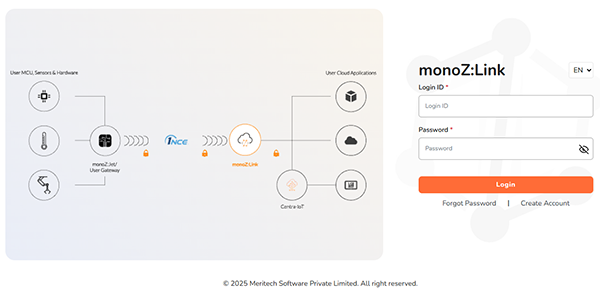
- Navigate to the monoZ:Link login page and click "Create Account" button
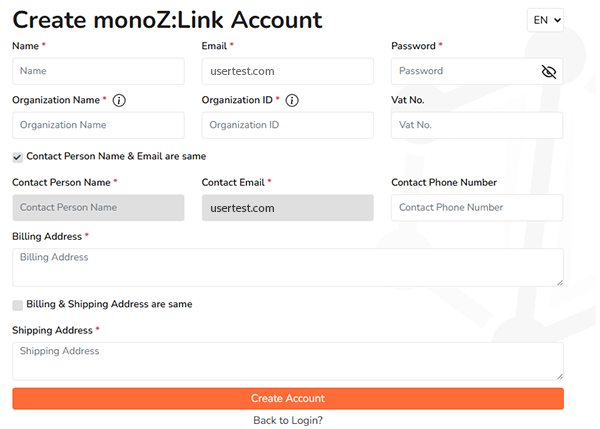
- In the screen that follows, enter the following information,
-
Name: Full Name
-
Email: Enter a valid email address. This shall be your login ID for monoZ:Link and OTP shall be sent to this ID for verification
-
Password: Password for your Login ID. Password must contain atleast 1 uppercase, 1 number and 1 special character
-
Organization Name: Enter the name of your company/organization.
-
Org ID: Unique identifier for your organization. This ID creation is automated by monoZ:Link.
-
Contact Details: Click same as above or in case if you need someone else as contact person in your organization then enter their details.
-
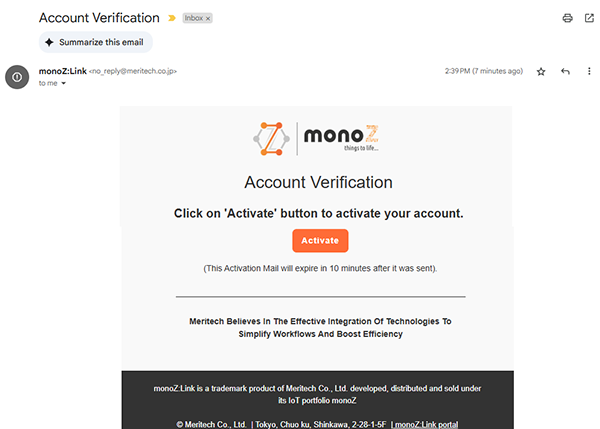
Verify your email address and activate your account by clicking on the link in the email you receive from monoZ. The link will activate your account and you should be able to login to link.monoz.io.
-
Create Order
monoZ:Link also hosts order management system to procure, track orders of monoZ products. Note that creating an order is available only for organisation owner. Follow the steps below to place an order.
-
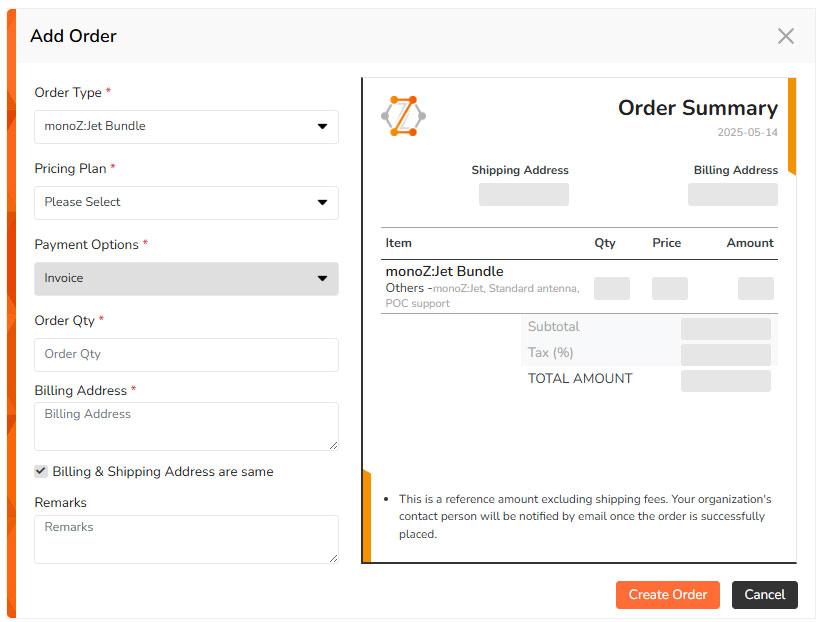
Navigate to the “Order” screen and click on the “Add Order” from the top right corner.
-
In the pop-up, choose your Order Type from the drop-down list.
-
Next, under choose a pricing plan for the order. Pricing plan varies based on the selected order type. For instance, monoZ:Link Bundle consists of 4 pricing plans however monoZ:Jet Bundle (POC Kit) has only one pricing plan.
-
Enter order quantity, shipping address, billing method and check the details in the summary view. Note that the total amount is exclusive of shipping fee and a representative from monoZ will contact your organisation`s contact person with the final quotation.
-
Once finalized, click “create order” to place the order.
-
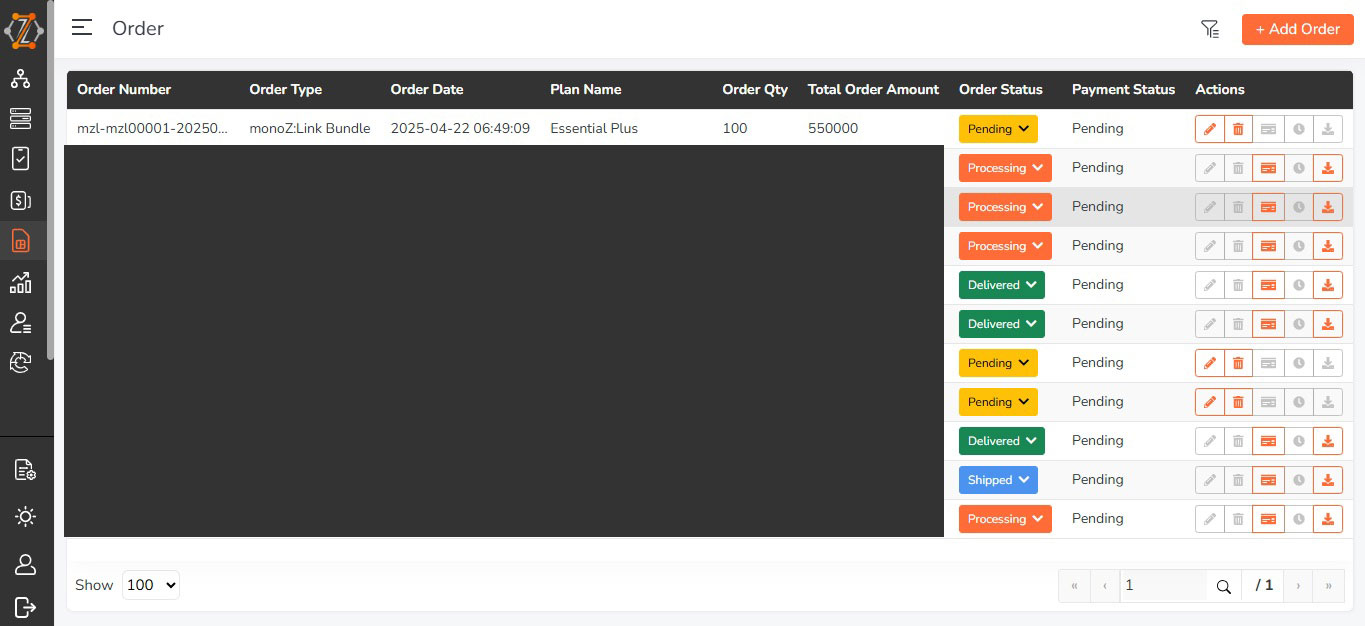
The created order appear in the orders list with a order number with “pending” order status. The created order can be edited until the order status is “pending”.
-
The order statutes can be interpreted as follows,
-
Pending: Order created but not verified by monoZ team
-
Processing: Created order has been verified by monoZ team and currently being processed
-
Shipped: The order has been shipped by monoZ team
-
Delivered: The order has been delivered at destination
-
Cancelled: The order has been cancelled by monoZ team
-
-
Every order status change is accompanied with an email notification to the contact email registered to the organization.
Create Protocol Configuration
Protocol configurations allow users to set the incoming protocol for device communication and as well to setup the destination server details as well as its communication protocol. monoZ:Link supports Webhook to any HTTPS endpoint as well as connectors to AWS services such as AWS IoT Core. Check out the Protocol configuration section for step-by-step guide on setting up protocol configurations.
Create Group
Groups provide a way to organize your devices, distribute firmware, and set a common protocol configuration based on product line, deployed regions, deployment date, etc. Follow the steps below to create a group and attach a protocol configuration.
-
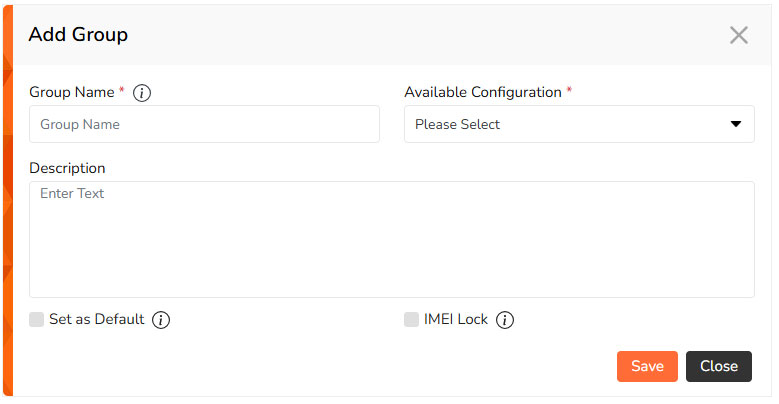
Navigate “Groups” and click on the “Add Group” button on top right corner.
-
Enter the respective information and click “save”.
-
Group name: Max 20 Alpha-Numeric characters including @$#._-
-
Available configuration: Select protocol configuration for the group.
-
Description: Free comments.
-
Set as Default: Sets group as default. The new devices added to monoZ:Link shall be automatically added to the default group.
-
IMEI Lock: When enabled, when an device is attached to the group it locks the SIM of device with the currently connected device IMEI. If its a new SIM that hasn`t been connected to network, then enabling this feature will lock the SIM to the IMEI of its first device. If the IMEI locked SIM is swapped to another device it will fail to connect with network.
-
Add Device to Group
Devices represents the SIM used by actual device in the field. Follow the steps below to attach a newl device with a group.
-
Navigate to Devices menu and click on “Registered Devices”. When new endpoints are procured, upon successful communication, the endpoints are available in this space.
-
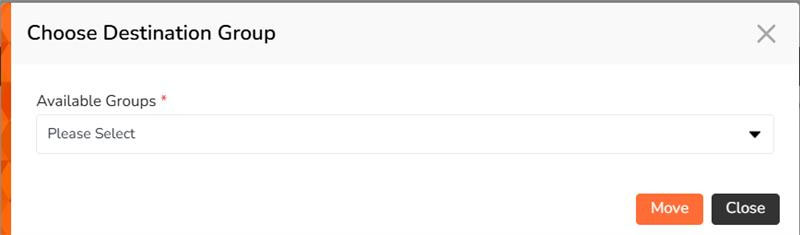
Select the devices to be moved to your Device list.
-
Click “Move” button on the top left corner and select the target Group from the dropdown list.
-
Upon successful addition, the devices shall appear in the “Devices” page. Now the setup is complete and device is set to receive data from physical device. However, we recommend a 1minute delay after moving device and before sending data.

View/Edit Device
Once device is registered and attached to a group, users can access the following additional information related to the device.
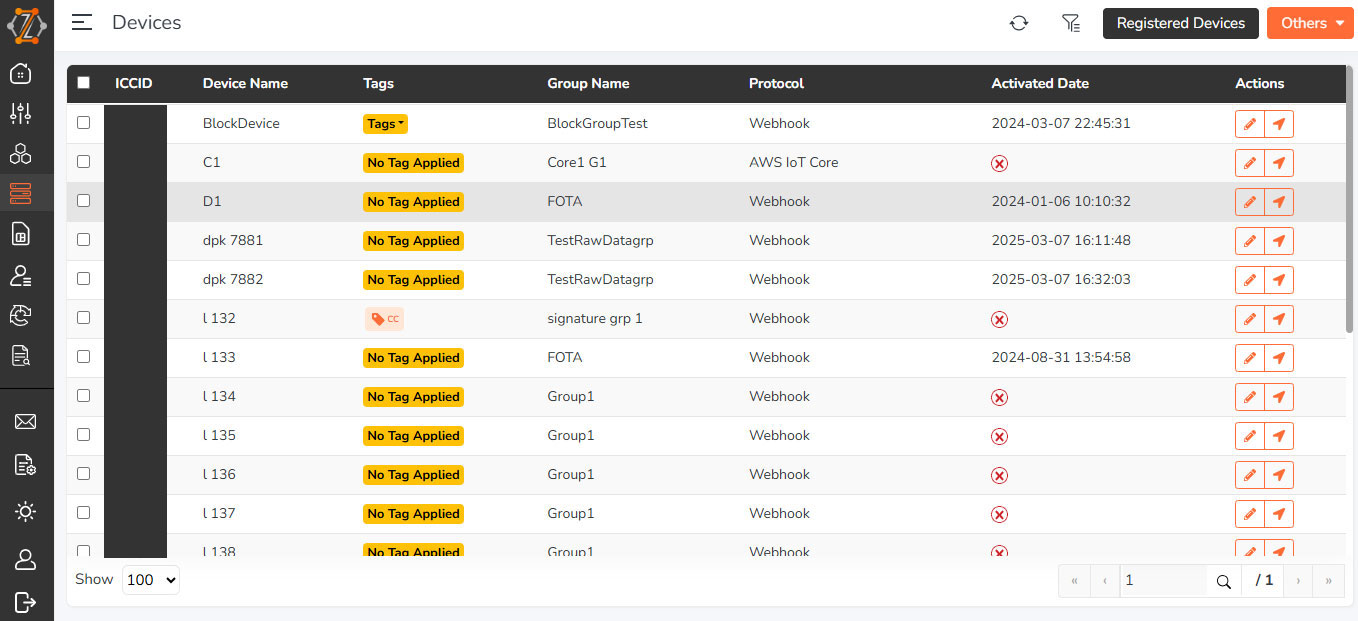
On the devices list, each device has 3 action buttons
-
ICCID: The unique 19-digit ID of the SIM used in physical device.
-
Device Name: Device name set by the user.
-
Tags: Tags associated to the device set by the user.
-
Group Name: The name of group where device is linked.
-
Protocol: The protocol configuration attached to the group of the device.
-
Activated Date: The activation date of the device.
-
Edit Button: Edit the device information such as name, group, tag.
-
Send Button: Initiate Downlink request.

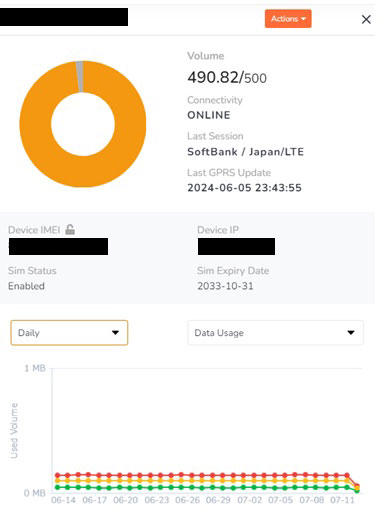
Upon clicking on device row, a side menu pops up with more information.
-
Action: Buttons to enable/disable IMEI lock, reset SIM, enable/disable SIM.
-
Volume: Used data volume against the remaining volume.
-
Connectivity: Online/Offline status of device.
-
Last session: Last connected operator and country.
-
Last Received Message Timestamp: Timestamp of last recieved message. Updated within few seconds upon receipt of message.
-
Device IMEI: IMEI information of the physical device.
-
Device IP: IP information of the SIM use in physical device.
-
SIM Status: Data status of the device. If disabled the device shall not be able transfer data.
-
Device Expiry Date: monoZ:Link plan expiry date for the corresponding device.
-
Usage graph: Daily & monthly data as well as uplink & downlink message usage statistics.
Send data from IoT device to monoZ:Link
monoZ:Link use MQTT protocol to recieve data from its registered device. Details related to the Uplink message over MQTT are as follows,
- Broker & Topic:
| Broker setting | data.monoz.io:1883 |
| UL Publish Topic | Level1/< orgid >/< iccid >/Level4 |
- Level1, level4 are optional levels that can be defined by the user.
- Max length of topic including ORGID & ICCID is 512 bytes.
- QOS support: 0 or 1.
- Payload message format: raw text or JSON.
- Max size of single message: 6KB.
- Recommended interval between two payloads by the same device is 1 minute.
- Even in the case of incorrect ORGID/ICCID, data publish shall be acknowledged by the broker. However it shall be immediately discarded without further processing.
Send data from monoZ:Link to IoT Device
Payload data can be sent from monoZ:Link to any registered device over MQTT protocol. Details related to the downlink message over MQTT are as follows,
- Broker & Topic:
| monoZ:Link broker | data.monoz.io:1883 |
| Subscribe Topic | /< orgid >/< iccid >/sub/level4 |
- Level4 is an optional levels that can be defined by the user.
- Max length of topic including ORGID & ICCID is 512 bytes.
- QOS support: 0 or 1 as per user setting.
- Payload message format: raw text or JSON.
- Max size of single message: 4096 bytes.
- Recommended interval between two downlink messages from the same device is 1 minute.
Follow steps below to send a downlink message from monoZ:Link to the device,
-
Click the "send downlink button" of the device for which downlink need to be initiated
-
User can choose between JSON/Text message format over QOS 0 or QOS 1
-
Enter the message in the DL message content and press send to initiate the downlink message.
-
When "Retain last message" is checked, the message to stored to the broker topic and device shall receive it upon successful subscribe.
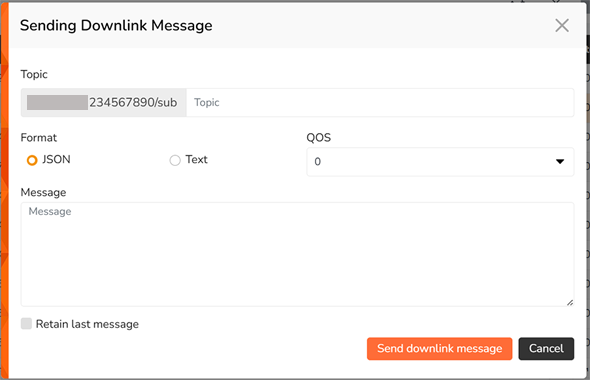
- Line breaks are not supported in the message box, including linebreaks in JSON format.
Add users to your account
Multiple users can be added to single organisation of monoZ:Link. Users have different levels of access as described below;
| Role | Limitations | Role |
| Owner | 1 | All functionality |
| Manager | 4 | Full access except placing new orders & user management |
| Read-only | 4 | Read access to all features except user & order management |
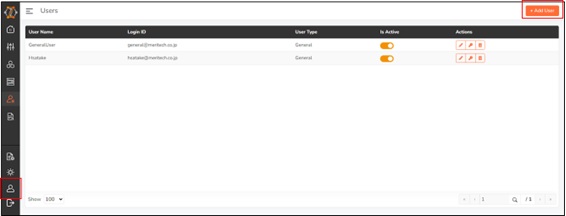
Follow steps below to create new users,
- Login as organisation owner.
- Enter “Users” menu and click “Add User”.
- Enter the respective information and click “save”.
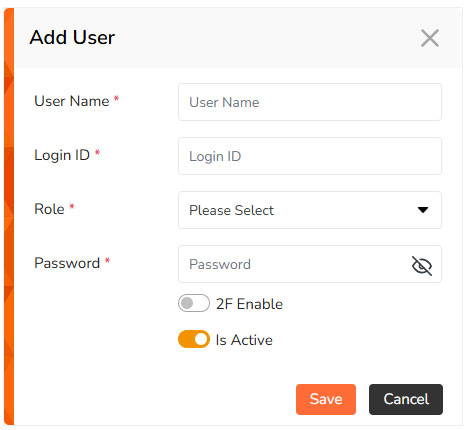
- User name: enter any name
- Login ID: enter login ID. Enter in email address format.
- User type: specify the user role. Set to [General/Read only].
- Password: enter the password.
- Active: creates an account based on whether it is active or not. If active, the user is immediately available.
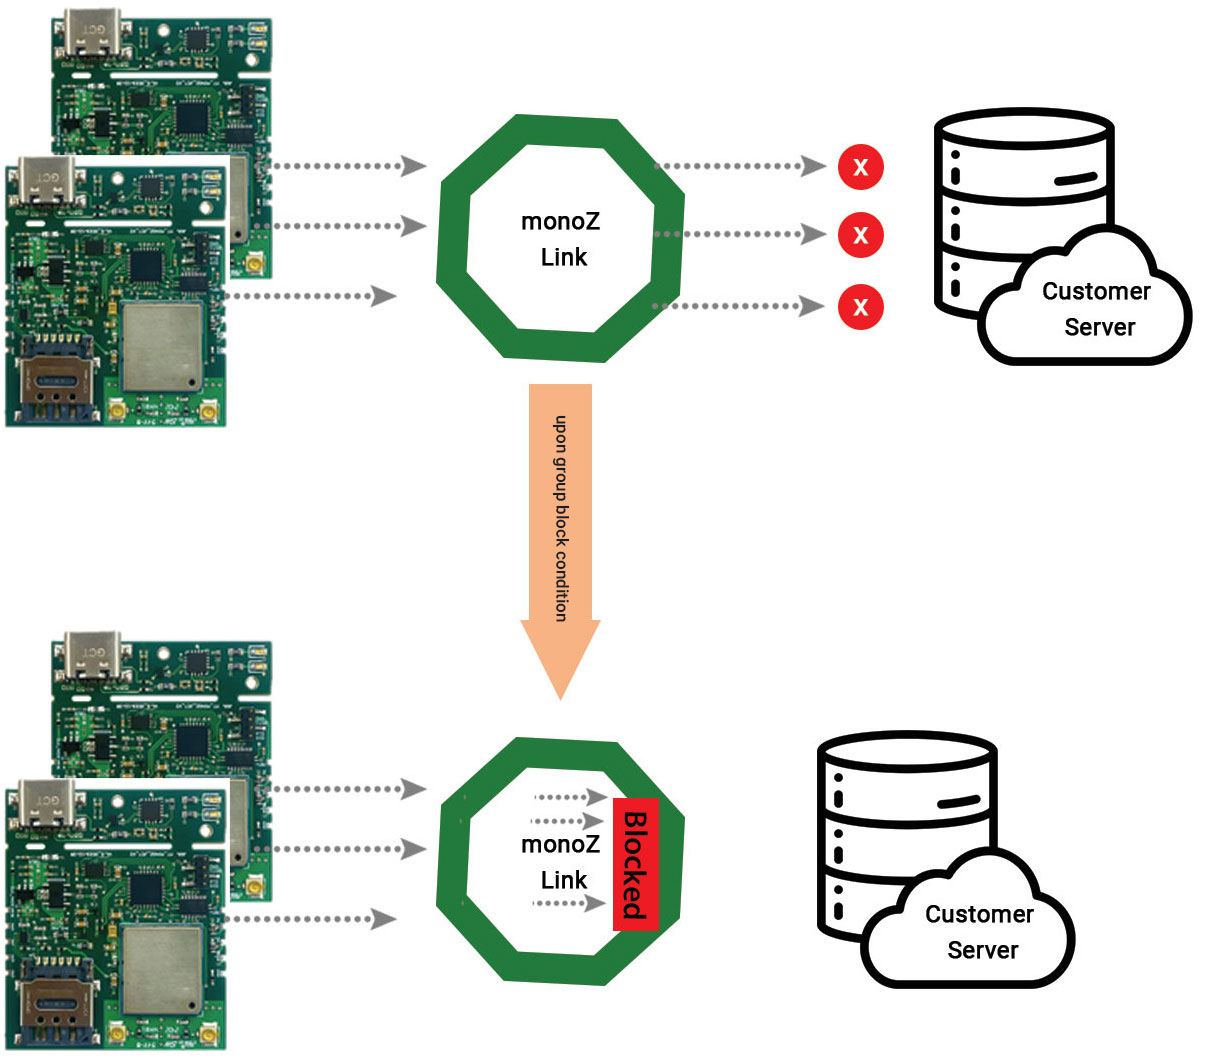
Limitations-Group Blocking
To block connections from misbehaving servers, monoZ:Link has incorporated group blocking feature. If data push failure occur atleast 10 consecutive times and for 10minutes then monoZ:Link determine that there is a problem with the user server and data push for all devices in that group will be stopped. An alert email will be sent to customer for unblocking the group and data push will resume only after unblocking.
Example scenario for blocking:
| Scenario | Condition | Result |
| Data push failed for 10 consecutive times in 5minutes and successful in next transfer at 6th minute. | 10 minutes: no | No block |
| Data push failed for 20 consecutive time in 10 minutes and successful in next transfer at 11th minute. | 10 minutes: yes | Block from 11th message |
| Data push failed for 9 consecutive time in 18minutes and successful in next transfer at 20 minute. | 10 minutes: yes | No block |